Recently my buddy Allison from Spunkyowl.com asked how I set up my backgrounds for my product photos. I’m glad she asked because it made me think to do a blog post to share it with everyone!
I did take a photography class in college but I am not claiming to be THE BEST photographer out there, and I believe my photography can always get better!
But I have come a long way from using my old iPhone, to buying a digital SLR camera! (More about that later because it’s not necessary with the quality of cell phone cameras today). But this post is about the background setup, and how I managed to pull it off for a little over $10 in supplies!
Here are some photos I did way back when I first started selling my crochet items online:
Bathroom light is NEVER better than natural sunlight! It doesn’t show the color as accurately as sunlight will. (Remember when arm knit scarves were crazy popular?).

2. The background for this bunny set is distracting because it isn’t consistent enough. Textures are fine, but this one is not intentionally sloppy enough. I mostly stick to using a poster board for this reason. Oh and P.S. the lighting sucks again!

3. If you will be doing wearable pieces like this scarf, GET A TRIPOD. Unless you are showing a progress photo on your Instagram (or any other social media account) the photo for your actual listing to purchase the item really shouldn’t have you holding the phone like this. There are plenty of inexpensive tripods that even hold cell phones and adjust for all phones!
You can purchase the one I have HERE
4. For these coasters, the sunlight should be IN FRONT of the product, not behind it. You should see some of the crazy poses I have to make to get myself in the right angle to have the sun hit the item from the front!

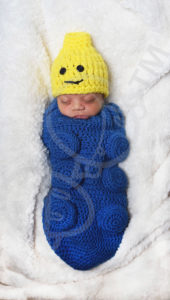
Here are some photos AFTER I got a better camera and use NATURAL SUNLIGHT with better backgrounds to FOCUS on the items:
(The Bunny pattern can be found on my blog HERE
Brushed Yarn tutorial HERE
Jellyfish pattern is HERE
Coin Purse pattern HERE )
HUGE difference right? I could have these SAME EXACT items photographed the way I did before, and they would be perceived as CHEAPER just because of the photo quality!
You want buyers to make their decisions based on your craft quality, not your photo quality!
Back to my Digital SLR camera: if you want to take your business to the next level and plan on doing this for a long time, I suggest you GET YOURSELF A DSLR CAMERA! This one from Amazon is what I use.
It seriously leaves VERY LITTLE (and sometimes zero) editing to do after the photo is taken. It just captures light so beautifully!
Like I mentioned before, cell phones today are great, and do an amazing job if you are using the CORRECT LIGHTING (Daylight or a lightbox) and correct backgrounds to highlight your products. It’s just that, DSLR cameras do it BETTER.
Ok class is over,
now let’s get to the SETUP!
WHAT YOU NEED:
- Foam Board: 20 x 30 inches: $3.59
- Colored Poster Board: $0.52, OR White Poster Board: $0.29
- Clothespins: $1.49 (I actually got mine for $0 from my mommy!)
- Storage Bin: $4.99 (Honestly, anything with a flat side to lean the foam board on and enough weight to keep it from sliding is good enough! But this doubles as storage, so less space taken up in business supplies!)
Grand Total= $10.59
Make sure you set up directly in front of a window or sliding glass doors (which is what I have). The sunlight needs to be right onto the item. This can be set up on a table instead of the floor as well.

Using clothespins, clip your poster board onto the foam board.

Make sure to CURVE and slide down the poster board enough to go UNDER the item and a little in front of it.
This curve is what gives your background a continuous & seamless look like the background can go on forever!
Check my Piggy Purse pic vs. my Beanie the Bunny or Nicky the NICU Jellyfish pic.

Lastly, get yourself into an army crawl position on the floor to get the shot! Unless you have space to set
That’s it! Quick to set up,
quick to take down.
Eventually I plan to make my own lightbox so I don’t have to rely on the sun to come out for photos. That will be a different post in the future!
How do you do your product photography?
Do you have a lightbox? Use Daylight? Let me know if you’d like me to elaborate on anything I mentioned in this post in the comments below 🙂


 Subscribe for a FREE baby set pattern & updates! (All the cool kids are doing it.)