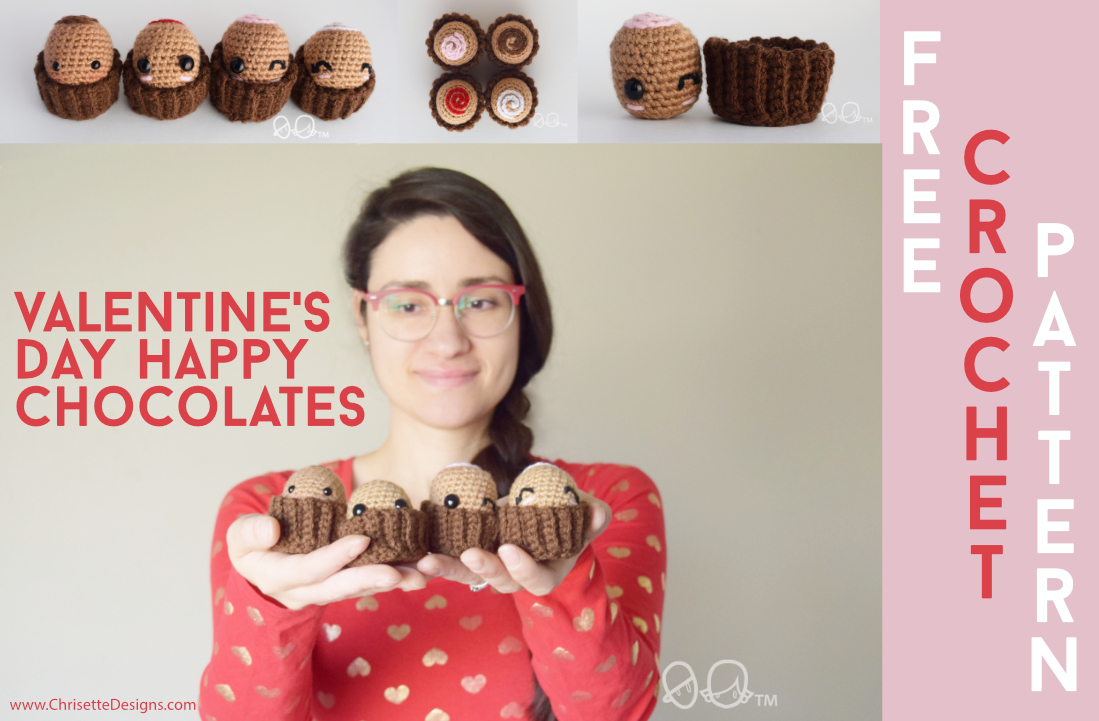
Do you want to give someone chocolate for Valentine’s day (or any day), but they aren’t a chocolate fan?!?
(Is that even real??)
Look no further! AND these chocolates have ZERO calories!
(But please don’t eat them.)
Gift them in a box!
I bought that box in the baking aisle at Hobby Lobby. You can get it HERE
I’ve included 4 different face options for you!

Little eyes (6mm safety eyes) 
10 mm safety eyes 
Winky face! 
Both eyes closed
PATTERN
PDF available for purchase
on Etsy HERE!
on Ravelry HERE!
NOTE: This is a Chrisette Designs original design.
This pattern is NOT to be SOLD.
You may sell what you make, but must use your own photos and should credit me by showing the link to my pattern here.
If you need assistance or find a site selling my pattern, please feel free to contact me at chrisettedesigns@yahoo.com Enjoy!
MATERIALS:
1. Medium weight size 4 yarn in any colors. I used Hobby Lobby brand “I Love This Yarn”. Here are the colors I used:
–Toasted Almond (chocolate ball)
–Brown (paper cup)
–Red (icing)
–White (icing)
–Soft Pink (icing)
2. 3.5 mm crochet hook: (or smaller depending on your yarn. Choose a hook that doesn’t leave big holes between your stitches!
3. Stitch marker: I like these Hobby Lobby ones.
4. Bent Yarn needle.
5. Polyfil: about 30 oz. (12 oz. bags are $2.99 at Hobby Lobby.)
6. Two 10 mm safety eyes (or 6mm like the one with the smaller eyes).
STITCHES: (U.S. Terms)
Magic Ring: Video tutorial here:
ch: chain
sc: single crochet
sc2tog: single crochet 2 together. Use the invisible decrease so you won’t have big holes. Here’s my video tutorial:
st(s): stitch(es)
sl st: slip stitch
blo: back loop only. Here’s my video tutorial:
NOTES:
1. Work in continuous rounds. Do not join or turn unless otherwise instructed.
2.
Use stitch markers. Here’s my video tutorial showing you how:
3. You do not want to crochet too loose because you will end up seeing the white fiberfill through your stitch holes.
4. The finished size is about 2.75 inches tall (6.985 cm), and 2 inches wide (5.08 cm).
5. This pattern is on 8.5 x 11in. pages so you can print them if you wish.

CHOCOLATE BALL: Use a st marker.
Row 1: Make a magic ring, sc 6 into it. Pull magic ring tight. (6 sts).
Row 2: 2 sc in each st around (12 sts).
Row 3: (1 sc in the next st, 2 sc in the next st) x 6. (18 sts).
Row 4: (1 sc in the next 2 sts, 2 sc in the next st) x 6. (24 sts).
Row 5-11: 1 sc in each st around. (24 sts).


ICING DRIZZLE: Here is a video showing this part:
Using surface sl sts, I attach the yarn with a long tail left on the inside of the ball where I want the line to start.
I began at the top center and followed the line to create a swirl.

I stopped when there were about 2 rows of swirls. Fasten off and tie the end inside.
CHOCOLATE BALL continued…:
For the rest of the rows for the chocolate ball, I USE THE INVISIBLE DECREASE for sc2tog. This technique keeps the holes tighter to hide the polyfil inside. Here is a video showing how to do the invisible decrease:
Row 12: (1 sc in the next 2 sts, sc2tog) x 6. (18 sts). DO NOT CUT YARN OR FASTEN OFF YET!
See photos below to see the difference with regular sc2tog decreases:

Regular sc2tog (HOLES) 
Invisible decrease (tighter openings)
EYES: there are 3 options:
1.) 2 eyes.
2.) Winking eye.
3.) Eyes closed.


Follow the same instructions for the winky face, just flip the left eye.
Optional: Sew a pink line for blush under the eyes, or add real blush on at the end.
CLOSING THE BALL: Fill with polyfil before the last 2 rows.
Row 13: (sc in the next st, sc2tog) x 6. (12 sts).
Row 14: (sc2tog) x 6. (6 sts).
**Fasten off with a short tail. Using a bent yarn needle, sew the hole closed by going through the front loop only of the 6 sts. Pull tight and hide the tail on the inside of the ball.
Here is a video I made showing how to close the ball nicely:
I also have a blog post with photos and video showing how to close the ball HERE
PAPER CUP: this will be made in 2 pieces.
RIBBED SIDES:
Ch 7. Starting in the 2nd ch from the hook, sc in each ch. (6 sts).

Ch 1 and turn. In the blo, sc in each st across. (6 sts). Repeat 28 times. DO NOT CUT THE YARN.
Sl st this last row to the ch 7 at the beginning to form a ring. Fasten off and weave the end in.

BASE OF PAPER CUP:
Row 1: Make a magic ring, sc 6 into it. Pull magic ring tight. (6 sts).
Row 2: 2 sc in each st around (12 sts).
Row 3: (1 sc in the next st, 2 sc in the next st) x 6. (18 sts).
Row 4: (1 sc in the next 2 sts, 2 sc in the next st) x 6. (24 sts).
Row 5: (1 sc in the next 3 sts, 2 sc in the next st) x 6. (30 sts).
Sl st in the next st. DO NOT CUT THE YARN.
ATTACH THE BASE:


(HERE is a post with 4 other FREE Valentine’s day themed patterns!)

I’d love it if you guys tagged me on social media so I can see your little chocolate creations! Or use the hashtag #chrisettedesigns
Instagram
Facebook
Twitter
PIN this for later!


 Subscribe for a FREE baby set pattern & updates! (All the cool kids are doing it.)
3 thought on “Valentine’s Day Happy Chocolates: Free Crochet Pattern”