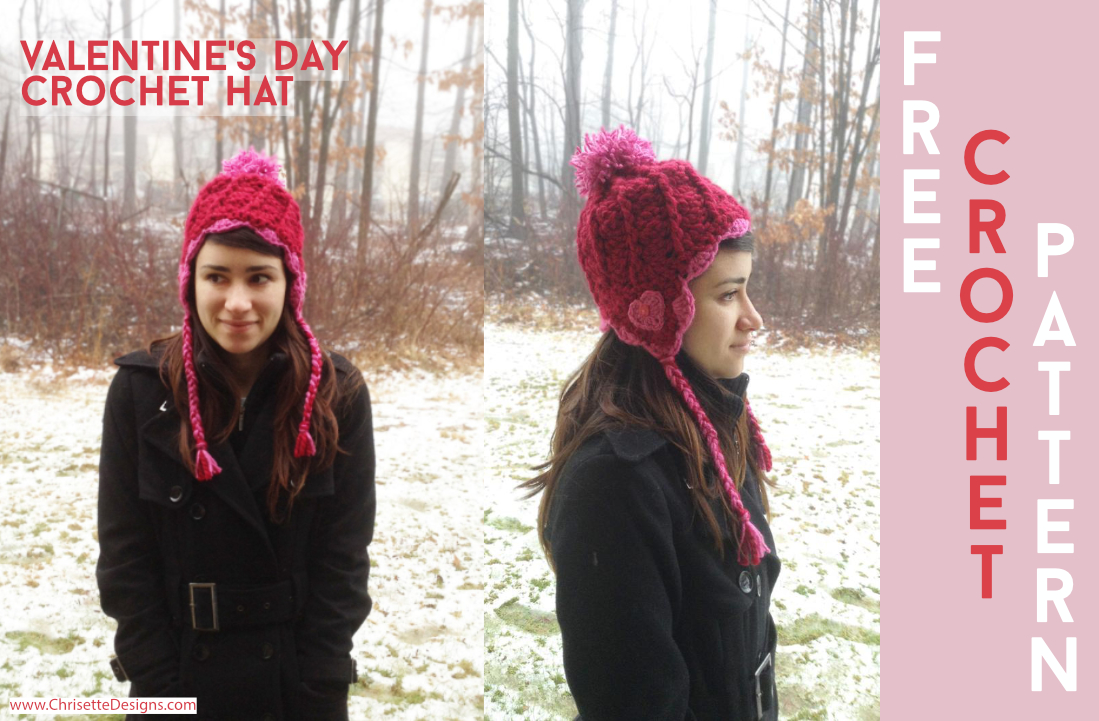
This Valentine’s Day crochet hat pattern is a combination of two patterns and then some additions like the pom, the ear flaps, braids and the shell stitch edge!
PIN this for later!
PATTERN
NOTE: This is a combination of patterns from other designers and some additions by me.
This pattern is NOT to be SOLD .
You may sell what you make, but must use your own photos and should credit me and the other designers by showing the link to my pattern here.
If you need assistance or find a site selling my pattern, please feel free to contact me at chrisettedesigns@yahoo.com Enjoy!
MATERIALS:
1. Chunky size 5 yarn for the red.
2. Medium weight size 4 yarn for the pink.
3. Tiny red heart buttons.
4. Bent Yarn needle.
5. Pom Maker. I used this beautiful large one by Pom Maker, but any brand will do! Even using a piece of cardboard works, it just might require more trimming.

6. Sewing needle and thread (depending on the holes on your heart button).
STITCHES: (U.S. Terms)
Magic ring: Tutorial below:
dc: double crochet
hdc: half double crochet
inc: increase. 2 dc into the same st.
dec: (invisible decrease): double crochet 2 together.
Here is a video tutorial of the invisible decrease, which looks much better than a regular decrease that leaves bigger holes in between stitches. The video shows with single crochet, but it’s the same with double crochet. You just wait for the last yarn over and do the 2nd double crochet.
st(s): stitch(es)
ch: chain
sl st: slip stitch
sk: skip
1st STEP: the base hat pattern by Classy Crochet which can be found HERE
NOTE: DO NOT do the brim part.
I used a 7 mm hook instead of a 6.5 mm since I have a tighter crochet tension.
I also repeated the last row 13 times instead of 11 times.
2nd STEP:
Ear flaps: About 12 sts apart from where they start at the back.
Row 1: ch 2. 8 dc. (8 sts).
Row 2: ch 2, turn. dec. 4 dc. dec. (6 sts).
Row 3: ch 2, turn. dec. 2 dc. dec. (4 sts).
Row 4: ch 2, turn. dec x 2. (2 sts).

3rd STEP:
Pink Border:
Attach yarn in the middle back.
4 dc in the same st. sk 1. sl st.
sk 1. 5 dc in the next st. sk 1. sl st.
(sk 1. 5 hdc in the next st. sk 1. sl st.) x 5
**You should be at the front of the hat now.**
(sk 1. 5 dc in the next st. sk 1. sl st.) x 5.
**Now you will go around the 2nd ear flap.**
(sk 1. 5 hdc in the next st. sk 1. sl st.) x 5
**You should be at the back of the hat now.**
(sk 1. 5 dc in the next st. sk 1. sl st.) x 2.

4th STEP:
2 Hearts: I used the pattern for the smallest size on this blog post HERE
Then I sewed a tiny heart button in the center with a strand of the pink yarn.
Sew each heart onto the ear flaps.
5th STEP:
Pom: Using the size large pom maker HERE I wrapped 5 layers of yarn before cutting it.
Attach it where the magic ring is at the top center of the hat.

6th STEP:
Braid Ties: Cut twelve 26 inch (66 cm) pieces of yarn (6 for each braid tie). Mix up how many of each color you’d like. I did 4 pink and 2 red for each braid. (8 pink and 4 red all together).
(The photos below are from my Broccoli hat, but they are done the same exact way! You can get that pattern HERE)

Insert your hook from the WRONG SIDE of the ear flap.

Grab all 12 pieces of yarn.

Do not pull through all the way! Just enough to grab the loop.

Like the 2 photos below show, grab the tail ends and pull through the loop.
Pull it tight and it will form a knot.

Split the strands in 3 and braid it almost to the end.
Tie a knot at the end and pull tight, leaving enough length to cut the strands evenly afterwards.

ALL DONE!


Please use the hashtag #chrisetteDesigns if you share your creation on social media so I can share yours on my page! 🙂 Be sure to tag me on social media so I can see your hats!
Instagram
Facebook
Twitter


 Subscribe for a FREE baby set pattern & updates! (All the cool kids are doing it.)