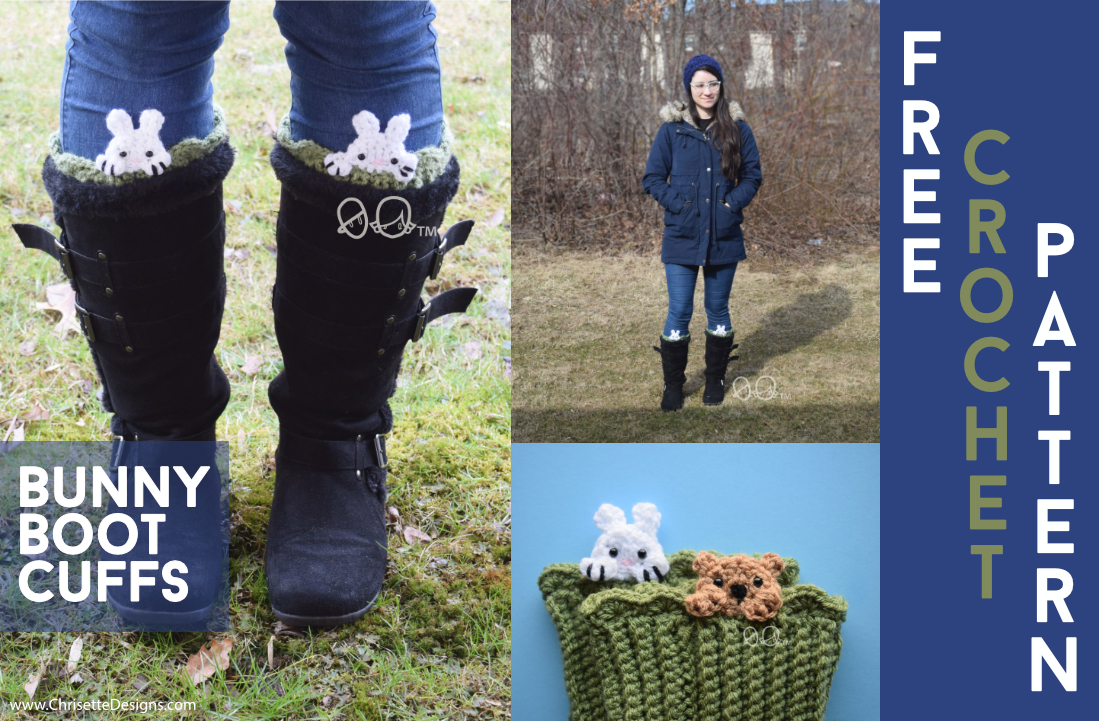
I made a thing that’s completely unnecessary that you also can’t live without.
Bunny and bear boot cuffs!
Technically the appliqué part can be added onto anything! It’s made in one go, no separate pieces! 🙌🏻🙌🏻🙌🏻
#teamNoSew
This uses such a small amount of yarn that it makes it the perfect scrap buster project!
Great for you market sellers!
3 options included!
1.Bunny Face:

2. Bunny Butt.
3. Bear

PATTERN
PDF available for purchase:
On Etsy HERE
On Ravelry HERE
NOTE: This is a Chrisette Designs original design.
This pattern is NOT to be SOLD.
You may sell what you make, but must use your own photos and should credit me by showing the link to my pattern here.
If you need assistance or find a site selling my pattern, please feel free to contact me at chrisettedesigns@yahoo.com Enjoy!
FINISHED SIZE:

MATERIALS:
1. Medium weight size 4 yarn in any colors. I used Hobby Lobby brand “I Love This Yarn” in these colors:
a. Light Sage (Grass)
b. White (Bunny)
c. Toasted Almond (Bear)
d. Pink (Bunny nose)
e. Black (Bear nose & paws)
2. 5mm crochet hook: (adjust hook size as needed according to gauge).
3. Stitch marker: I like these Hobby Lobby ones.
4. Bent Yarn needle.
5. Four 6mm safety eyes (unless you plan to sew them on).
6. Fabric glue (Optional).
7. Cat Brush (for bunny tail option.)
NOTES:
1. Do not count the beginning chain of each row.
2. The finished boot cuff is about 6 inches (15.24 cm) wide, and 7 inches (17.78 cm) tall to the tip of the bunny ears. The Bunny alone is about 2 x 2 inches (5.08 cm). This will fit a 13.5-15 inch calf. (The photo shows it on a 15-inch calf.)
3. If you need to size up or down, you will need to add or subtract 4 rows at a time to be able to have enough stitches for the shells to line up. Every additional (or subtracted) 4 rows will add (or subtract) 1.375 inches to the width of the boot-cuff. It should be about 1-1.5 inches smaller than the circumference of the calf where the boot cuff will sit.
4. Check your gauge first to get the right sizing. The rib stitches will stretch as well. Adjust your hook if necessary.
5. Do the foundation chain for the beginning instead of a regular chain. This has more stretch to it, unlike a regular ch that tends to be tighter than the other rows. Here is a video showing how:
STITCHES: (U.S. Terms)
st(s): stitch(es)
.
sk: skip
.
sc: single crochet.
hdc: half double crochet
.
ch: chain.
sl st: slip stitch.
dc: double crochet
.
tr: triple crochet.
flo: front loop only.
blo: back loop only. Here’s a video:
GAUGE:
Do a foundation ch of 14 sts. Ch 1.
1 sc into each st across. Ch 1. (x 14).
14 sc x 14 rows = 4” (10 cm) square.


NOTE: If you watch this over on my youtube channel, there are time links in the description to bring you to each section of this so you can more easily pick up where you left off.


Watch your fingers if you’ve never done this! Here is a video showing brushed yarn:
Tie the tail onto the Bunny’s butt. Cut it down to shape it more if you need to.


ALL DONE!
Enjoy this celebratory Boot Cuff dance video by @LizzyBeeHandmade 🙂


(Coming soon! Subscribe below to see when it’s available!)
I also have this rabbit with a carrot doll pattern on the blog HERE!

I’d love it if you guys tagged me on social media so I can see your little Bunny Boot Cuffs! Or use the hashtag #chrisettedesigns
Instagram
Facebook
Twitter
PIN this for later!


 Subscribe for a FREE baby set pattern & updates! (All the cool kids are doing it.)
2 thought on “Bunny & Bear Boot Cuffs Applique: Free Crochet Pattern”