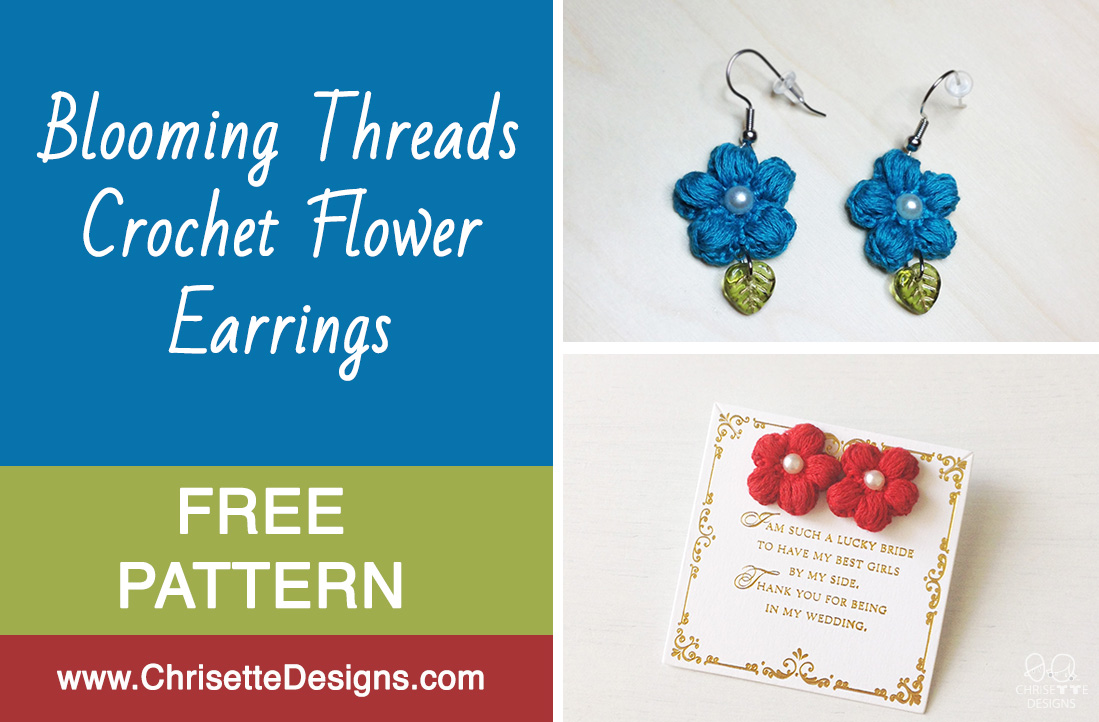
You DO NOT need to be an experienced jewelry maker to make these Blooming Threads earrings!
(I sure wasn’t!)
These Blooming Threads earrings were created when I was planning my wedding and I wanted to make something for all of my bridesmaids.

I actually ran out of time before the wedding date and never finished them, but I decided to still create a pattern for others to make these!
PATTERN
PDF available for purchase here!
NOTE: This is a Chrisette Designs original design.
This pattern is NOT to be SOLD.
You may sell what you make, but must use your own photos and should credit me by showing the link to my pattern here.
If you need assistance or find a site selling my pattern, please feel free to contact me at chrisettedesigns@yahoo.com Enjoy!
MATERIALS:
I know it looks like a lot of supplies, but it’s really only three things besides the flower!
- 1.65mm crochet hook: (Also on Amazon HERE)
- Embroidery floss in your color of choice. You only need 1 skein. (I used DMC brand floss from Hobby Lobby. It’s the same stuff used for cross stitch.) NOTE: Do not separate the strands, use all 6 plies together. (On Amazon HERE)
- Fabric Glue: (On Amazon HERE)
- Earring backing post FOR STUDS like the red ones above. (I chose ones with a wide base so that the earring stays upright against your ear.)

IF ADDING THE HANGING GREEN LEAF BEAD:

- Rounded needle nose pliers: It’s best to use round ones so it does not make a dent in the rings. I bought this set and all 3 have been useful, so it’s worth getting! (On Amazon HERE)

2. Green leaf bead (12mm): They must have a hole for the jump ring to go through. I got mine from

3. Jump rings. It comes in silver or gold. (On Amazon HERE)

4. Earring hooks:
a. Silver: You will need pliers to open up the ring to attach the flower. (On Amazon HERE)

b. Gold: These are nice since there’s no backing to lose. These made it super easy to attach the flower since you just run the wire through a stitch on the petal. Use this if you like your earrings to dangle. If not, use the same post for the earring stud look.

OPTIONAL SUPPLIES
- Earring Cards: The one in the photo with the gold text was purchased at Hobby Lobby and is no longer available there. But there are plenty of options on Amazon and other craft stores!
2. Rhinestone sticker (for the flower center).
3. Pearl sticker (for the flower center).
4. Magnifying lamp: If your vision isn’t so great like mine, you may want one of these to make your life easier! I can still crochet these without it, but it helps!
This one is also from Hobby Lobby
This one is from Amazon
5. Larger Earring backing: These add more stability for the stud earrings (like the red ones) but I haven’t had a problem using the backings that come with the stud posts.
FINISHED SIZE:
Without the Leaf: 2 cm. (20 mm)
With the leaf bead: 2 cm wide, 3 cm long. (20 mm wide, 30 mm long)
ABBREVIATIONS:
ch= chain
sl st= slip stitch
yo= yarn over
sp= space
st(s)= stitch(es)
sc= single crochet
FLOWER:
You will be crocheting this with the back side facing you. When attaching the flower to the earrings post, make sure to flip it to the nice side where the petals are puffed up.

STEP 1: Ch. 4.

STEP 2: Sl st into the first ch.

STEP 3: Ch 1. 10 sc into the ring.
Crochet over the tail end when you do these sc sts.
Also, it may look like 10
Sl st into the first sc. (10 sts). Count backward from the last sc to make sure you are doing the
STEP 4: Ch 3.

(Yo, insert your hook in the same sp as the ch 3, pull up a loop at the same height of the ch 3.) Repeat 3x’s

Yo, insert your hook into the NEXT st, pull up a loop
Yo, insert your hook in the same st, pull up a loop, yo, pull up a loop

Ch 5.

Sl st into the same st.

Sl st into the next st.

1 petal is done!
Each petal will be made like this into 2 sc from round 2. Remember to crochet over that tail end from the beginning so you don’t have to weave it in at the end!
STEP 5-8: Repeat step 4 four more times so you end up with 5 petals.
On the last petal, fasten off after the last
OPTIONAL: Use the fabric glue to attach a pearl or rhinestone to the center of the flower.

If you are doing the stud look, glue the flower to the earring backing and you’re all done!
If you like the dangle ones with the green leaf bead, continue…
KIDNEY EAR WIRES:
If you are using the kidney ear wires, you simply slide the hook part into the top center of one of the petals.
REGULAR EAR WIRES:
If you are using the regular ear wire with the loop at the end, take your rounded needle nose pliers and open the ring.
Make sure you insert it the right way so that the good side faces out away from your face when you wear them.
LEAF BEAD:
For the leaf bead, take one of your jump rings and open it with the rounded nose pliers.
Then slide it into a stitch between the petals directly across from the ear wire.

Close the ring.

DONE!
Or just put them on…
Optional: Do a little dance to celebrate!
If you liked this pattern, please support me on Ko-Fi!
I’d love to see your “Blooming Threads” earrings by using the hashtag #chrisettedesigns OR by tagging me here:
Instagram
Facebook
Twitter


 Subscribe for a FREE baby set pattern & updates! (All the cool kids are doing it.)
2 thought on “Blooming Threads: Free Flower Earrings Crochet Pattern”